Do you wish there was a better way to build Webflow membership sites for your clients?
Webflow is a flexible visual design tool, content management system (CMS) and hosting platform.
There are several use cases for someone wanting a membership site, e.g. starting a subscription business, a free or paid membership, a company intranet, or a website for a club or association, etc.
But there are logistical and operational challenges for an agency to overcome when building membership sites for clients:
How can you centrally create and manage all membership sites for your clients without having to create multiple logins, billing accounts, etc., for yourself?
How can you set up admin accounts for each of your clients while still managing account billing centrally or having the option to let the client setup direct billing?
How can you quickly and seamlessly transfer ownership of the membership site to your client if/when required?
How can you create a new recurring revenue stream by building and managing your clients' membership sites in an efficient and scalable way?
At MemberSpace, we've been working hard to solve these challenges. And with our latest release, we're excited to announce new features that will help agencies and freelancers to build, launch, and manage Webflow membership sites for your clients in an easy and scalable way.
Here’s an overview of how MemberSpace can help you do that:
1. Add Membership Functionality to Your Webflow Site
You can install MemberSpace on any Webflow website within a few minutes and quickly set up the core membership functionality including:
- Lockdown member-only web pages
- Create flexible membership plans (free and paid)
- Enable signup and login/logout functionality
- Add a paywall to accept one-time or recurring payments
- Integrate with best of breed third-party tools e.g. via Zapier
- Plugin a third-party community forum to your membership site e.g. Muut, Circle, etc.

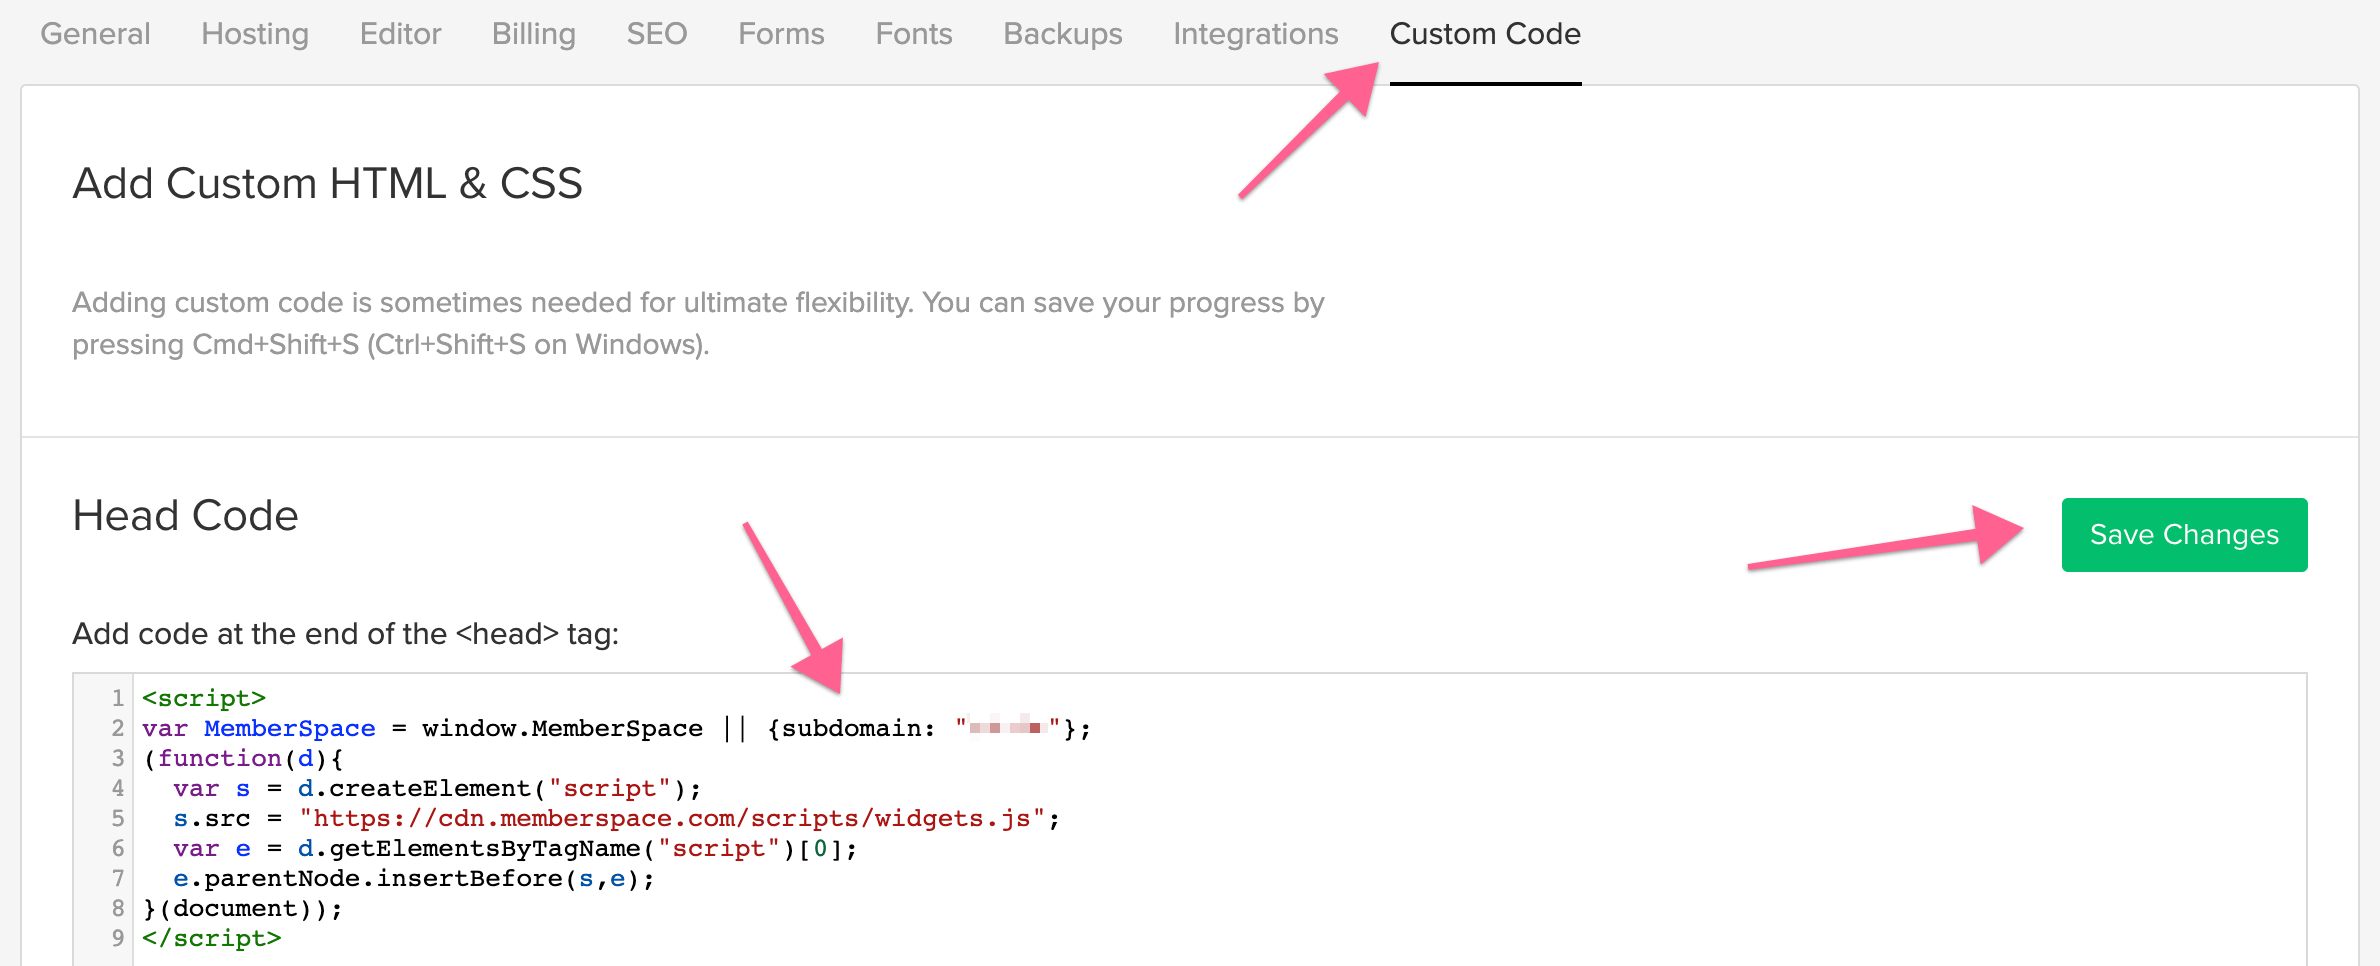
Figure 1: To install MemberSpace simply add our install code to your Webflow website settings
2. Connect Multiple Websites to Your MemberSpace Account
You can easily add additional membership websites to your MemberSpace account. By default, you’ll have two website slots, meaning you can connect two websites to your single MemberSpace account for no additional cost.
You can connect unlimited websites to your single MemberSpace account, but after the first two, you’ll pay $20/month per site.
And you can add or remove websites under your account at any time.

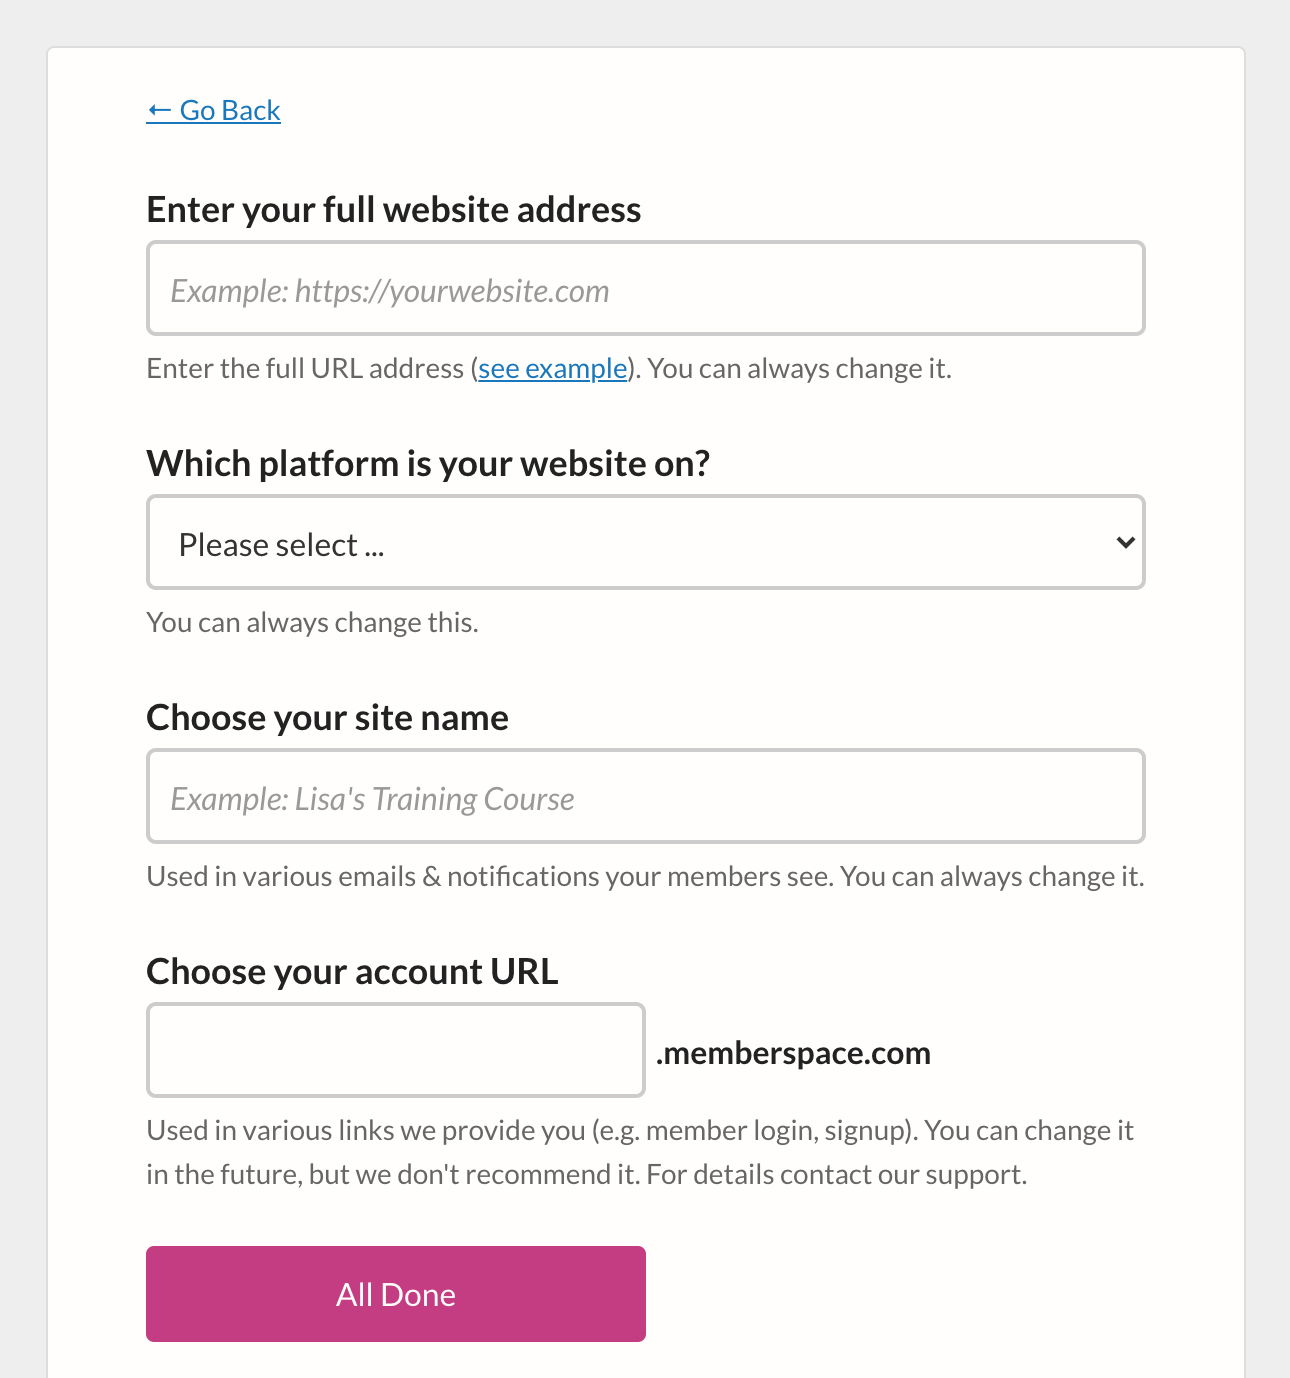
Figure 2: To add a new website to your account, just complete this simple form.
Each website you add to your MemberSpace account will have separate member pages, member plans, and members.
3. Create and Manage Multiple Admin Accounts in One Place
When you add a new website to your MemberSpace account, you will be the site owner for that membership site by default. But you can invite clients or team members to be a site admin of one or more websites under your account.

Figure 3: To add an admin to a specific website, simply invite them.
A site admin can do everything a site owner can do in the MemberSpace backend, except for adding/removing admins, disconnecting the site from MemberSpace, or viewing your MemberSpace subscription billing details.
This allows you to give your client admin access to their membership site backend, while you still managing the website, subscription, and billing on their behalf. This makes it easier to manage numerous membership sites for clients and charge a premium for your services.
Note: A transaction fee will automatically be deduced whenever your client charges their members. The fee will be based on your MemberSpace subscription plan. Learn more about transaction fees here.
4. Transfer a Membership Site to Your Client
At some point, you may want to transfer ownership of a membership site to your client. We’ve made the transfer process quick and simple.
All you have to do is to make sure that you’ve already invited your client to be an admin for the website (see the previous section) and ask them to join a current MemberSpace plan under their account.
Once your client has done that, you can easily transfer the site ownership to them.

Figure 4: To transfer ownership to your client, just click the link.
We’re excited to introduce these new features for Webflow customers and to help you build, launch, and manage membership sites for your clients in an easy and scalable way.
Check out these help docs for more information about these new features: