A podcast is a great way to share your message, build an audience and grow your business. But there's also value in having a private podcast, especially if you run a membership site.
In this article, we'll show you how to create a private podcast for your membership.
Why Create a Private Podcast?
A private podcast works like a public podcast in that people can listen to your episodes from your website or using a podcast player app such as Apple Podcasts, Castro, Overcast, etc.
But unlike public podcasts, your private podcast doesn't show up in public directories. So no one can listen to your private podcast unless you've invited them and/or given them access.
Creating a private podcast can be as simple as an ads-free version of your public podcast and/or you could create bonus content exclusively for your members.
By providing a private podcast, you give people yet another reason to join your membership. And it can help you retain members for longer because they'll lose access to updates in your private podcast as soon as they cancel their membership.
How to Create a Private Podcast
Here's how you can create a private podcast for your membership.
1. MemberSpace
If you want to keep things really simple, you can create a private podcast on your membership site using MemberSpace. With this approach, your members can listen to your private content from your membership site, but they won't be able to listen in a podcast player app.
You'll need a MemberSpace account to protect the private podcast page, manage who can access the page, and charge for access. You can also provide free access to your members if you want.
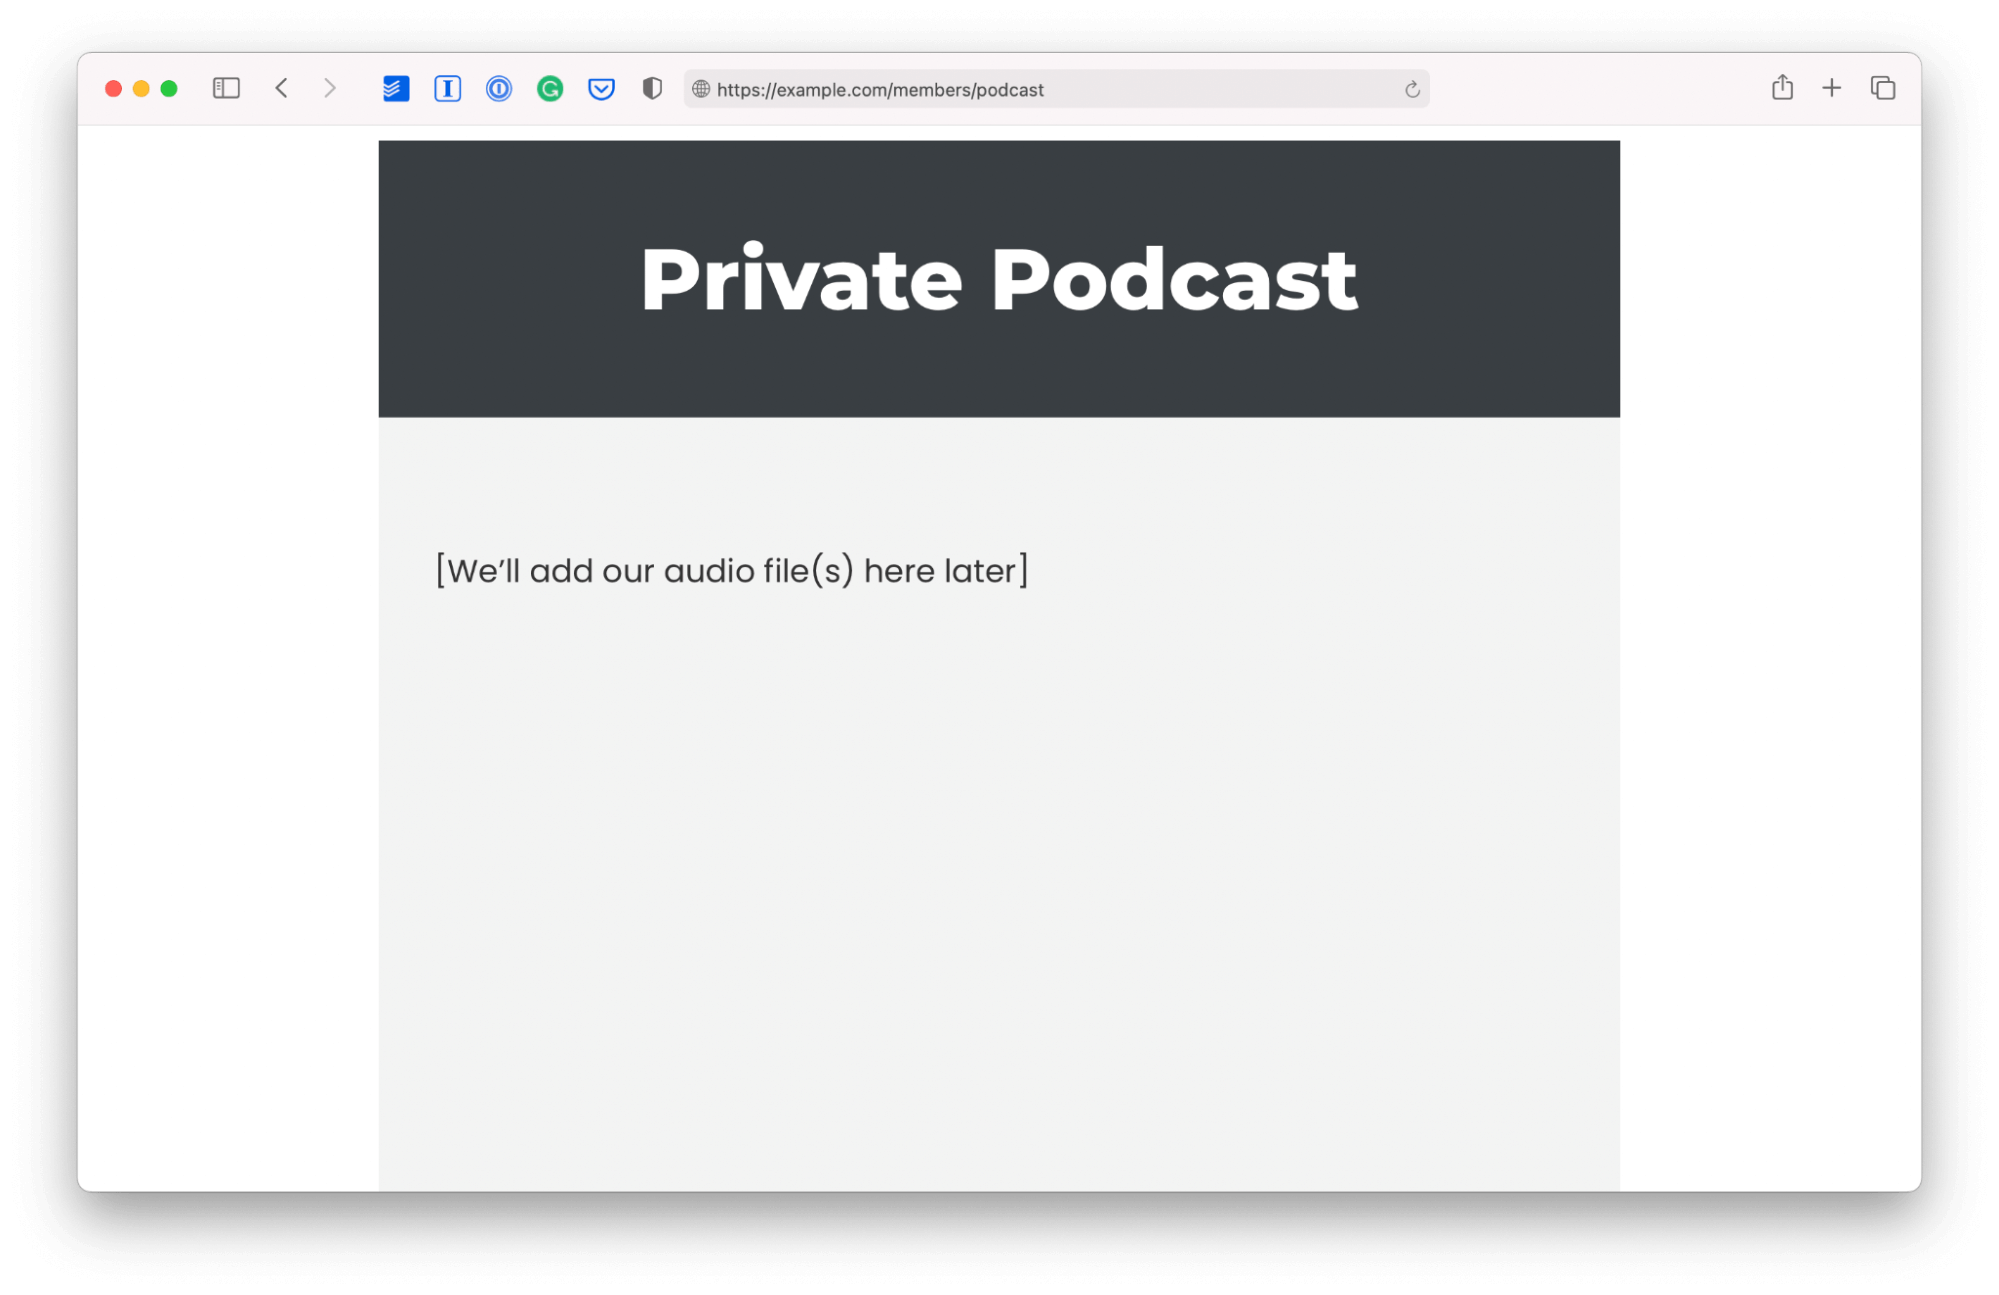
Step 1: Create a private podcast page on your website
Once you've recorded at least one episode, you're ready to create a private podcast page on your website. This is where you're going to embed your podcast audio files.
In your CMS (e.g. WordPress, Squarespace, Webflow, etc.) create a new web page with a headline and brief description of your private podcast.
Step 2: Securely upload your audio file to MemberSpace
MemberSpace's Content Links feature is a super-secure way to share audio files with your members. You can also use it to securely share videos, images, PDFs, and more.
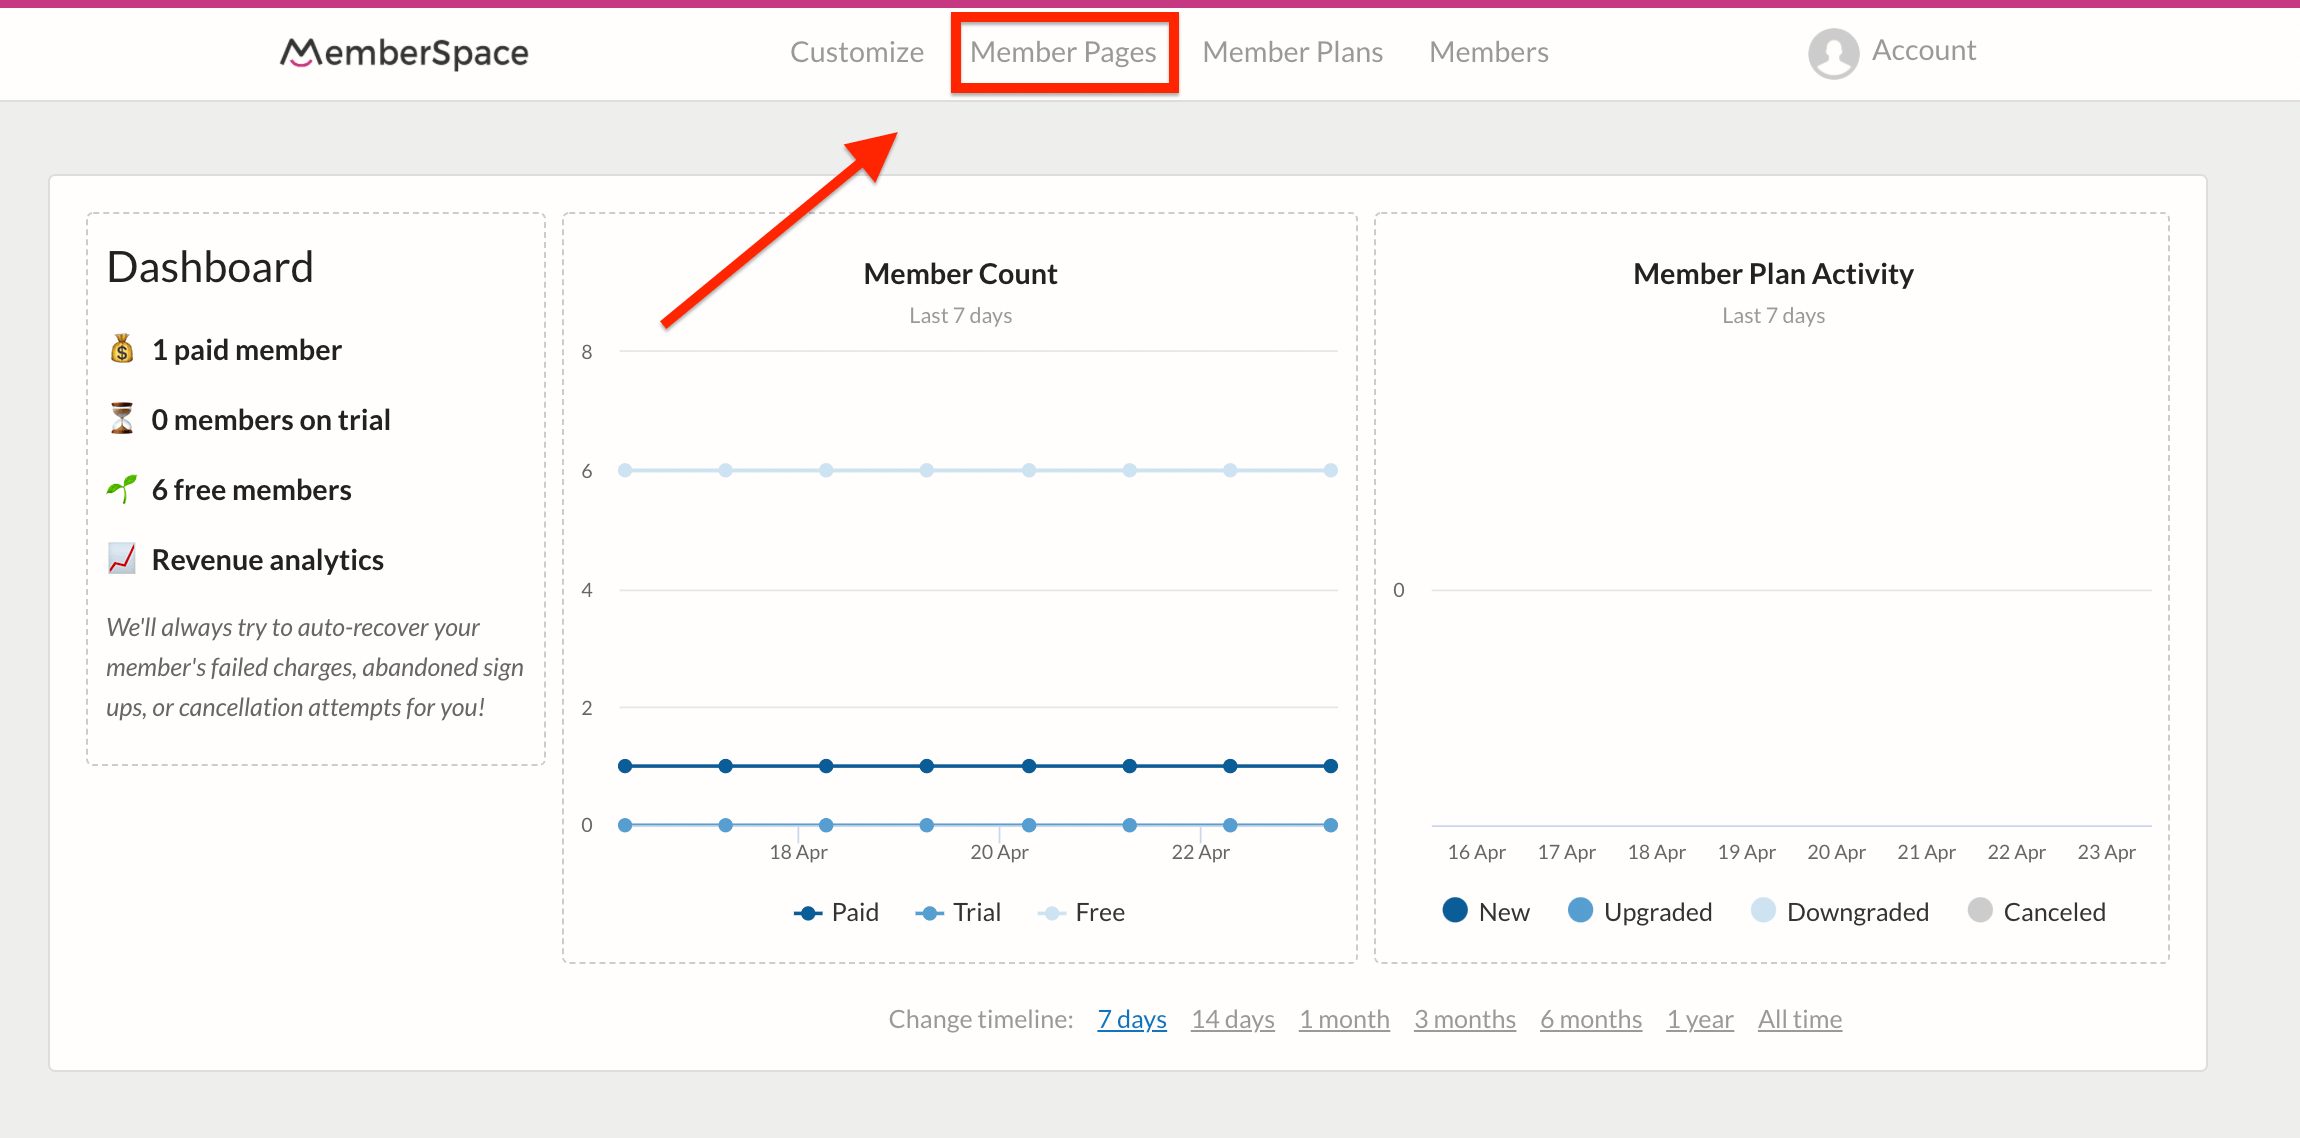
From the MemberSpace backend, click the 'Member Pages' link at the top of the page:
Next, select the 'Manage Content Links' button.
If you're creating a Content Link for the first time, click the 'Add Content Links' button.
Then follow the instructions to upload your audio file to MemberSpace.
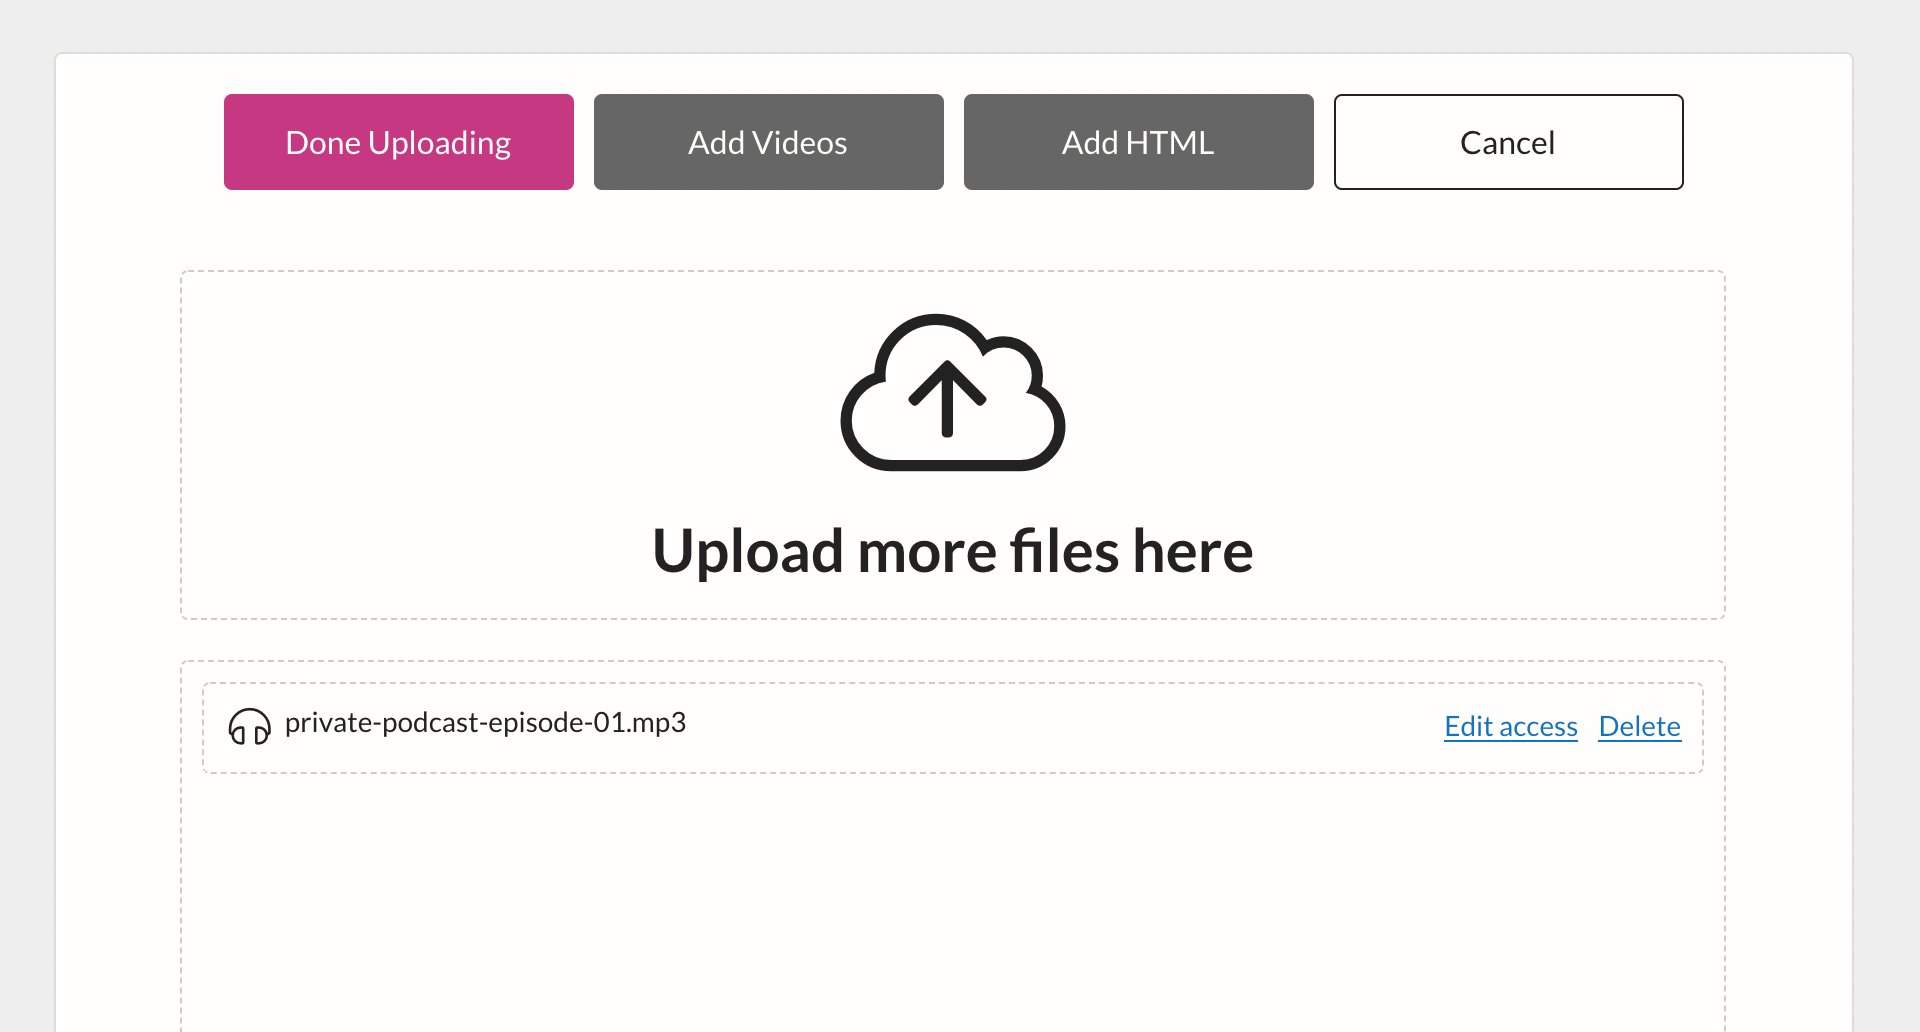
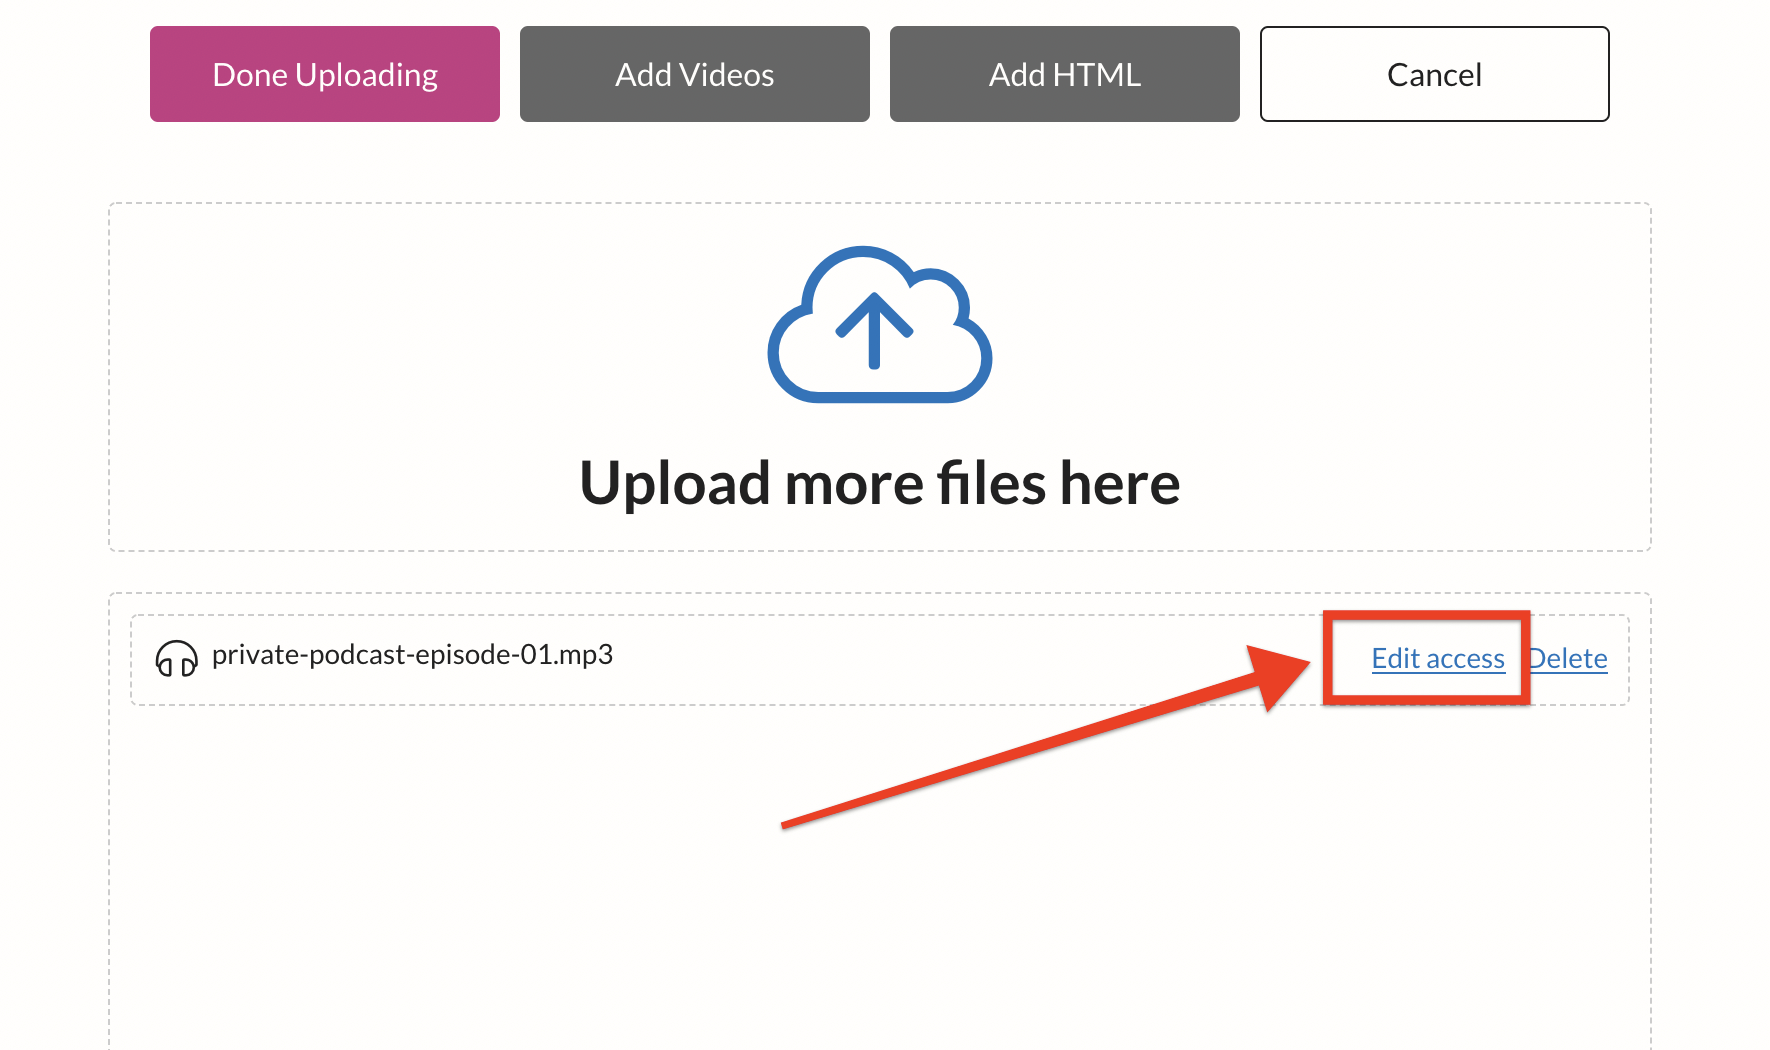
After uploading your file, click the 'Edit Access' link.
Select who can get access, how, and when.
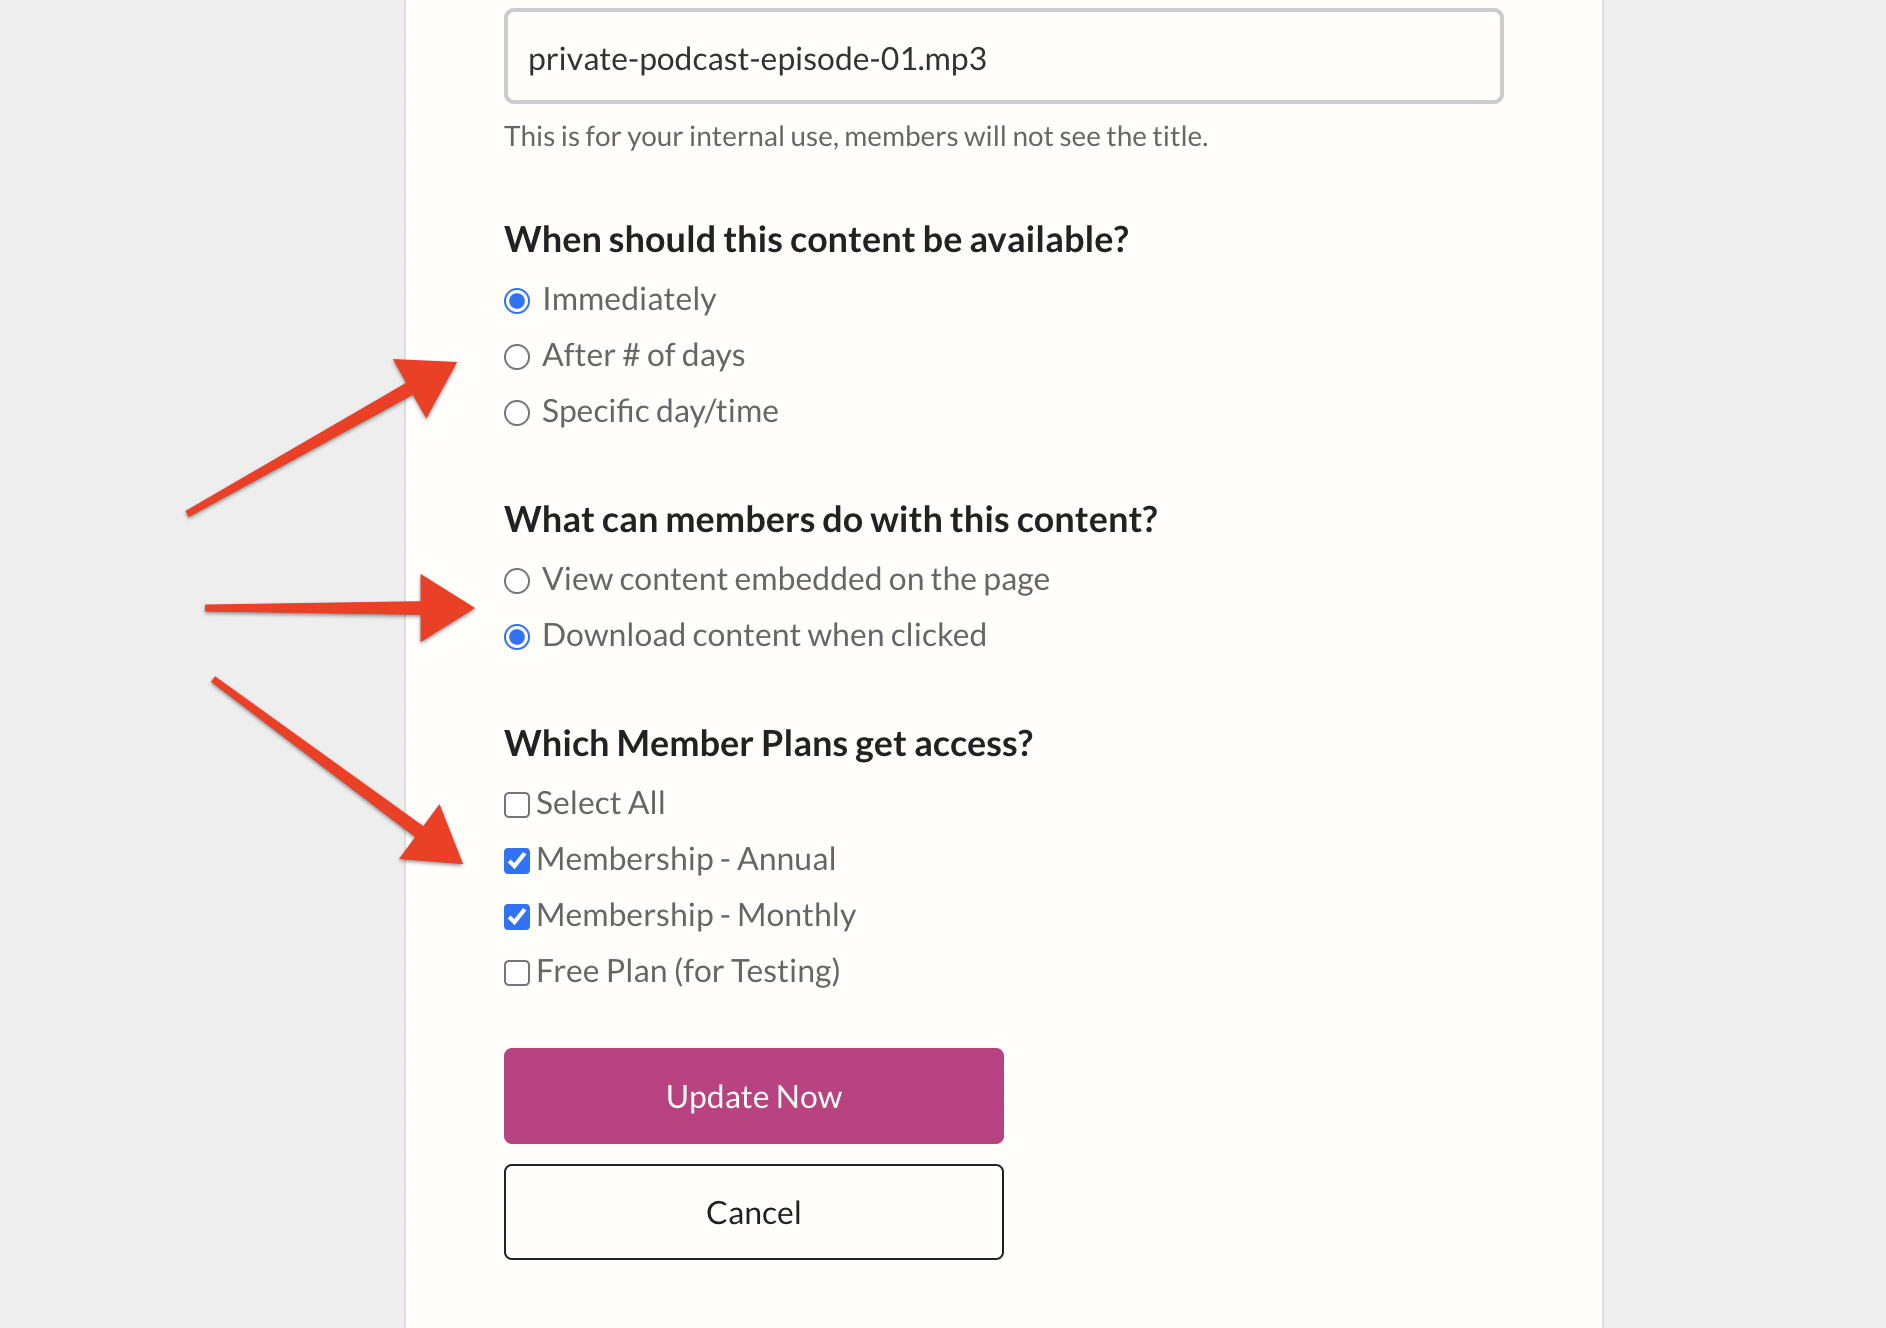
If you haven't created any Member Plans yet, we'll show you how to do that in a minute.
For now, click 'Done Uploading' and then click 'Copy' next to your file name.
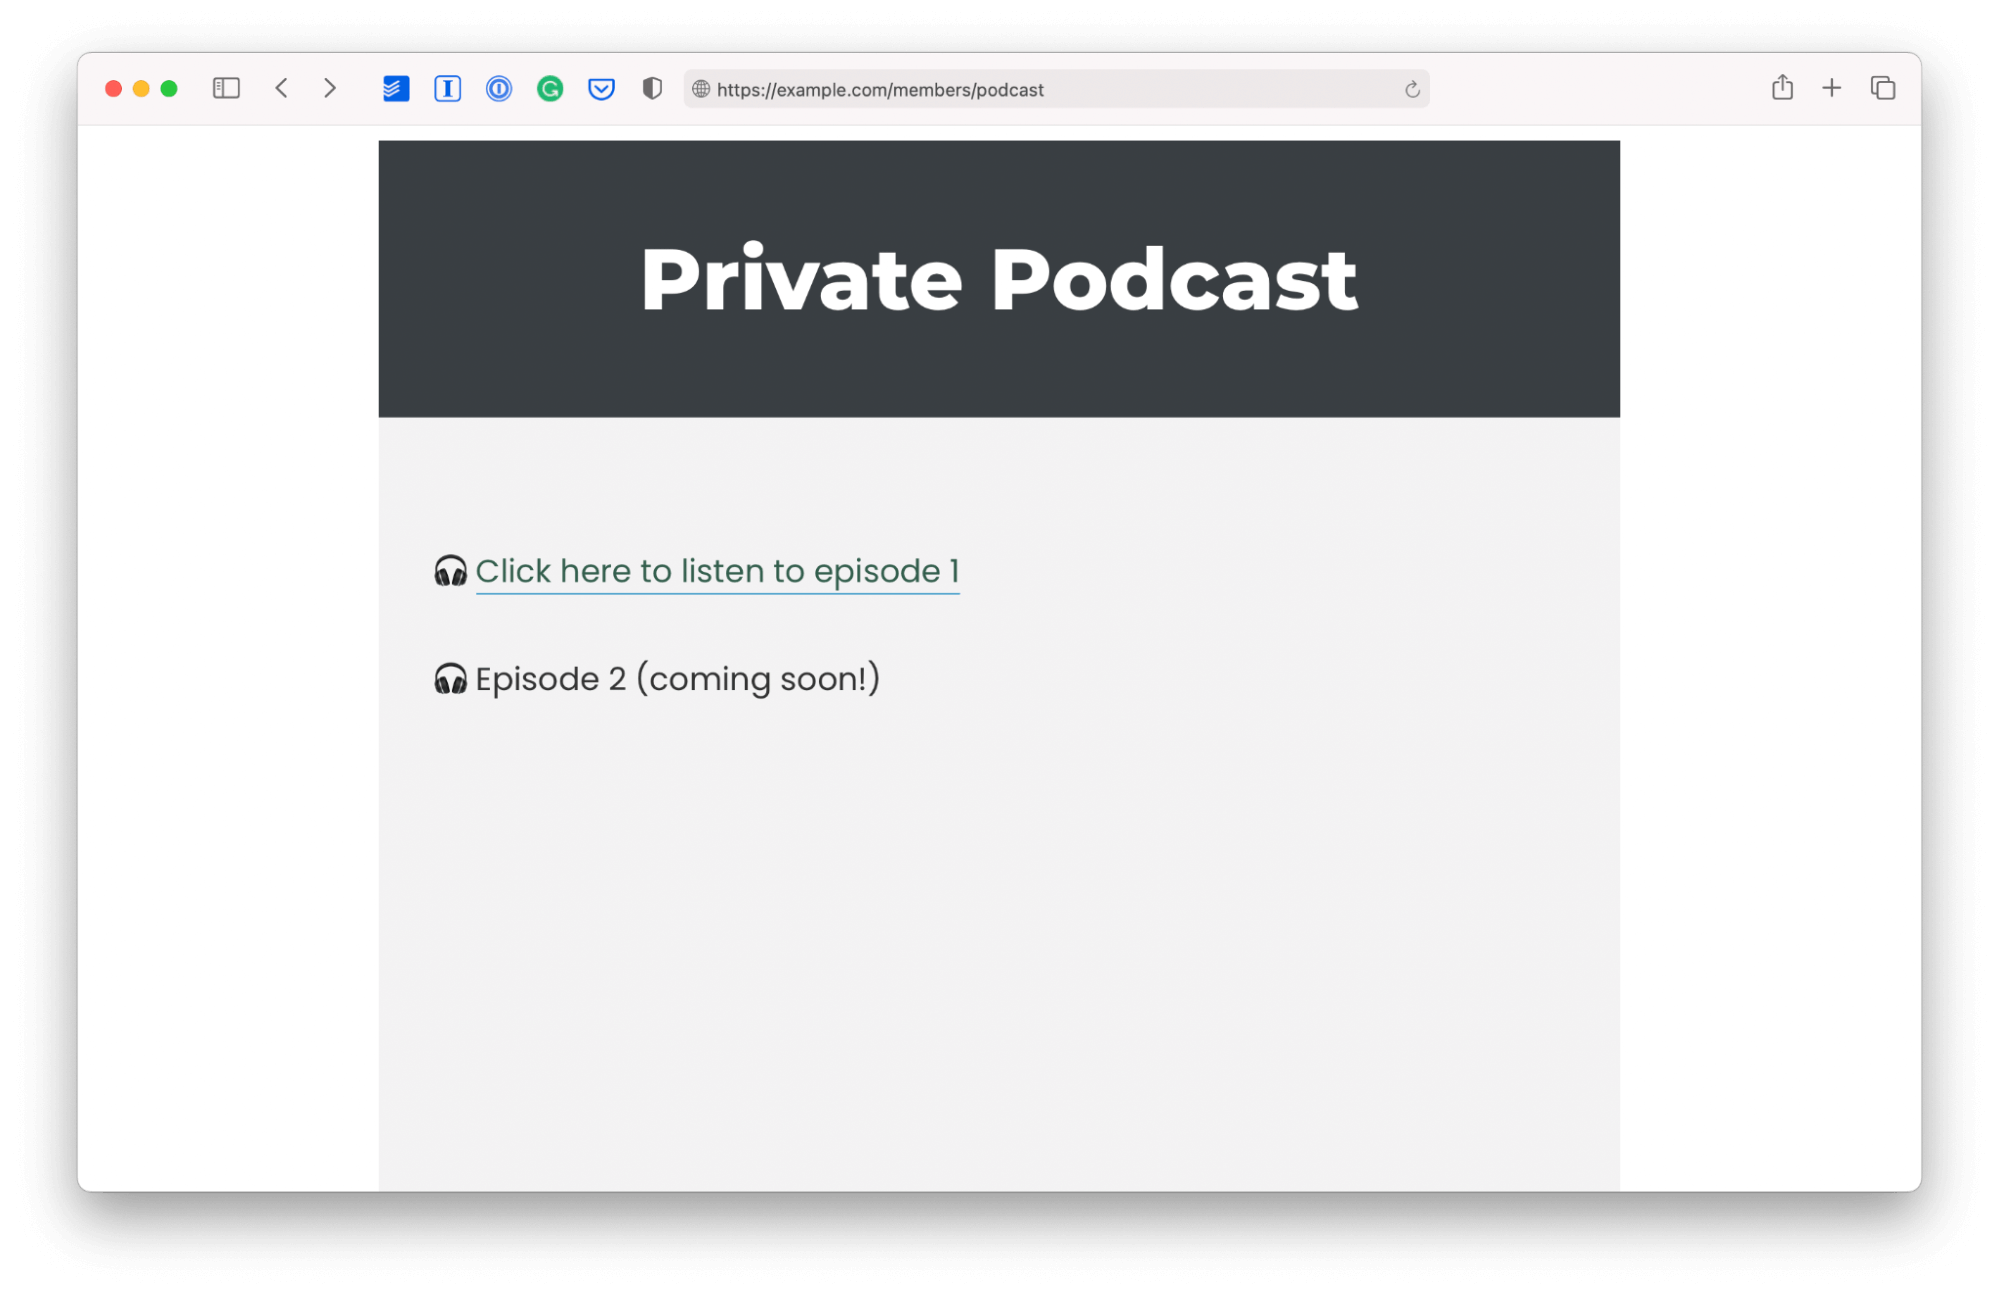
Step 3: Add your episode to your private podcast page
You will place this link on your podcast page like this:
Step 4: Protect your private podcast page so only members can access it
Now that your private podcast page is set up on your website, you need to protect it, so only specific people can access it.
If you haven't already set up your website to integrate with MemberSpace, you can find instructions on how to do that here or contact us (support@memberspace.com), and we'll help you with the setup.
Now you're ready to use MemberSpace to protect your private podcast page:
- In the MemberSpace backend, select your website from the list
- Click the 'Member Page' link in the top navigation
- Next click the 'Add Member Page' button
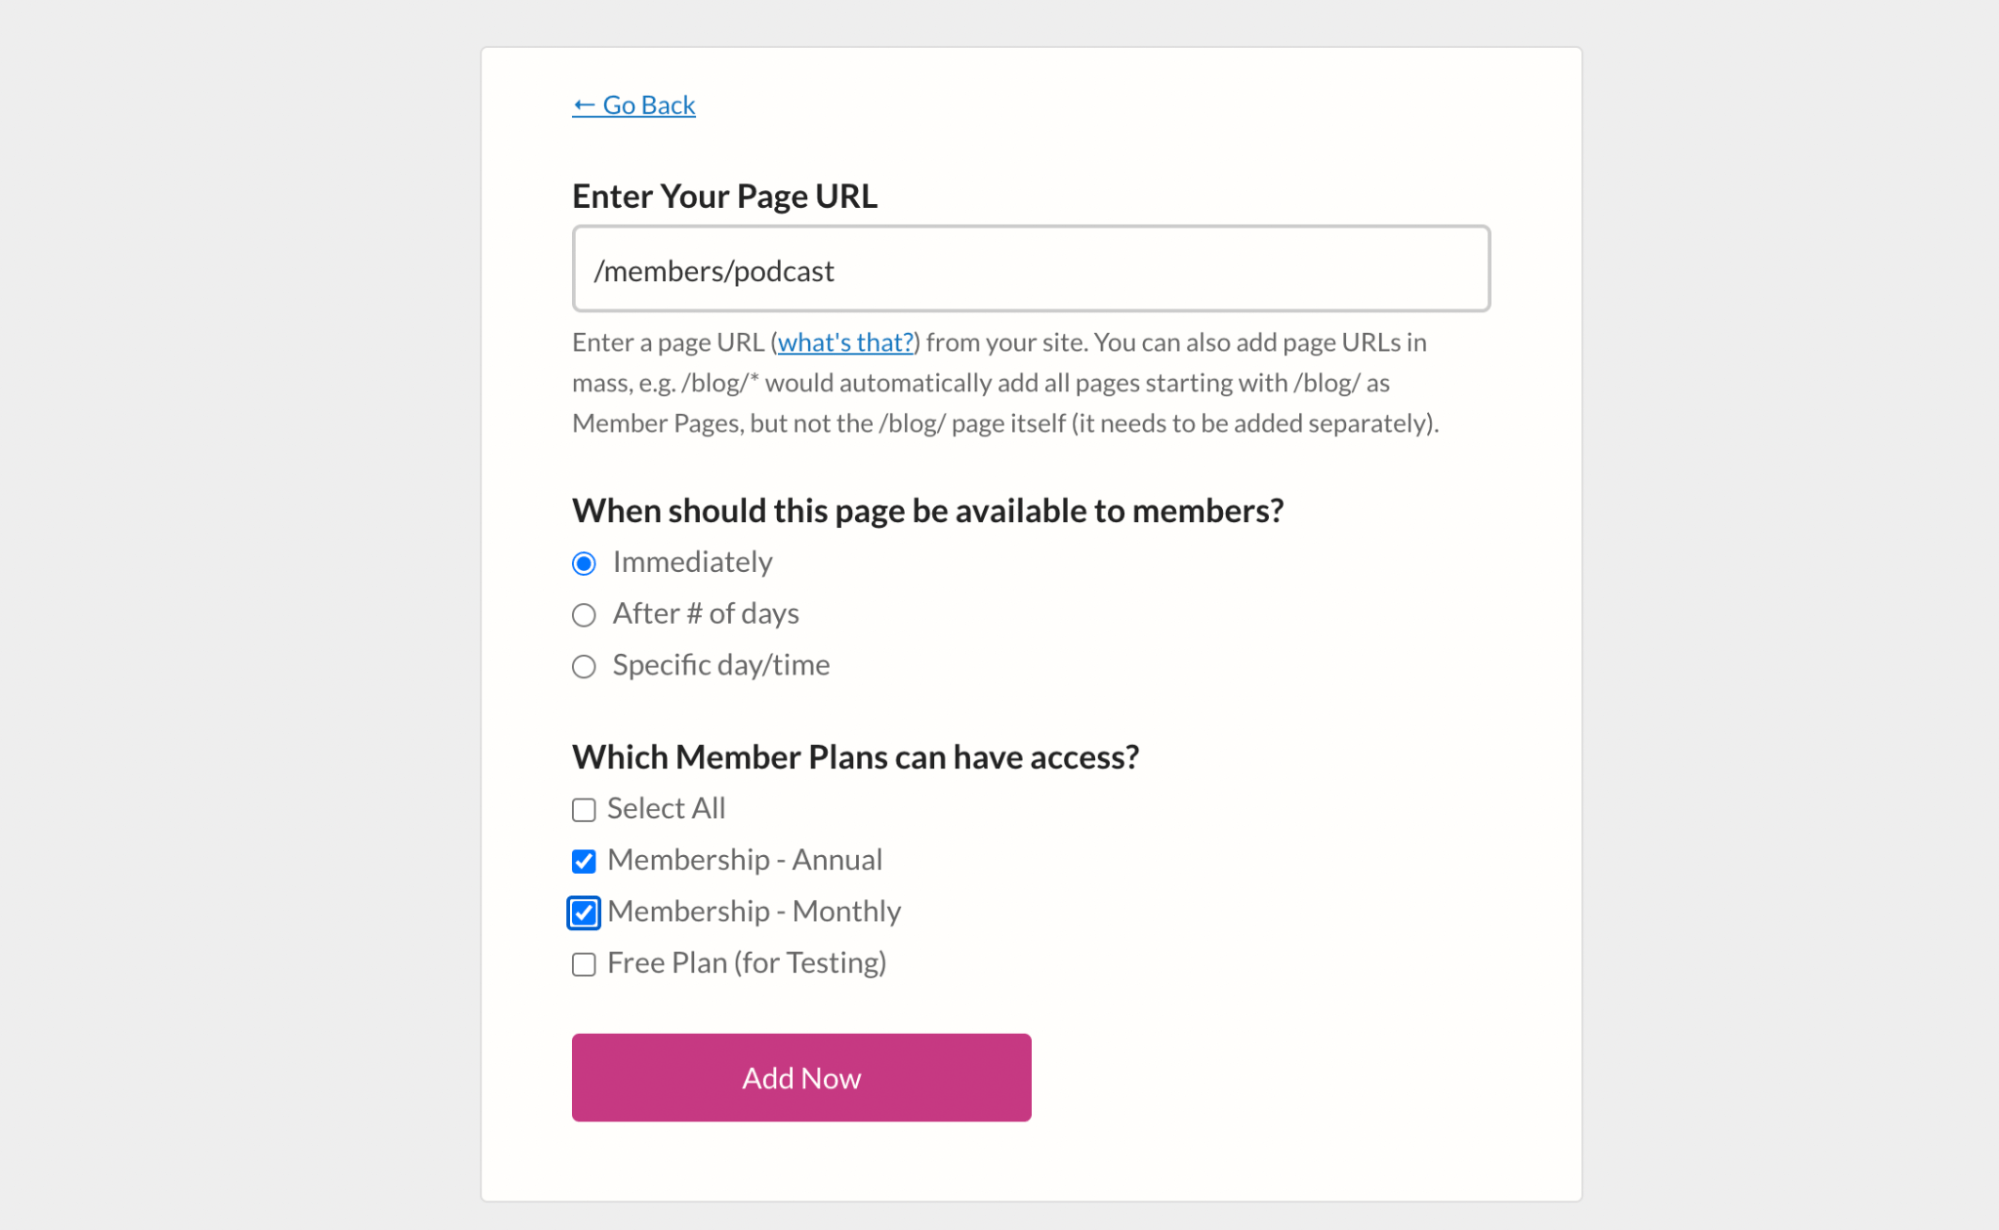
- Copy and paste the URL of your private podcast page
- Select which 'Member Plans' can access this page (if you don't have an existing 'Member Plan', we'll show you how to create one in the next step).
- Click the 'Add Now' button
Step 5: Create a new Member Plan
The MemberSpace 'Member Plans' are how you choose the cost and terms to access your Member Pages and Content Links.
If you need to create a new 'Member Plan':
- In the MemberSpace backend, select your website from the list
- Click the 'Member Plans' link and then click the 'Add Member Plan' button
- Select the type of member plan e.g. free, one-time payment, recurring payment, etc.
- Enter the name and description (optional) of your new 'Member Plan'
- Under 'Which Member Page(s) can be accessed' select your podcast page
- Complete the rest of the form and then click the 'Create this plan' button
Step 6: Add members to your plan
Now you're ready to add members to your plan. You can do this in 2 ways:
- Manually inviting people to join and access your podcast
- Giving people a link to signup
To manually add a member to your plan:
- In the MemberSpace backend, select your website from the list
- Click the 'Members' link and then click the 'Invite New Member' button
- Type in the name, email and select which plan you're inviting them to join.
- Click the 'Invite Member Now' button
Your members will receive an invitation email (which you can customize) and when they click the join link they'll be asked to enter their credit card details (if the plan is not free).
To give people the signup link:
- In the MemberSpace backend, select your website from the list
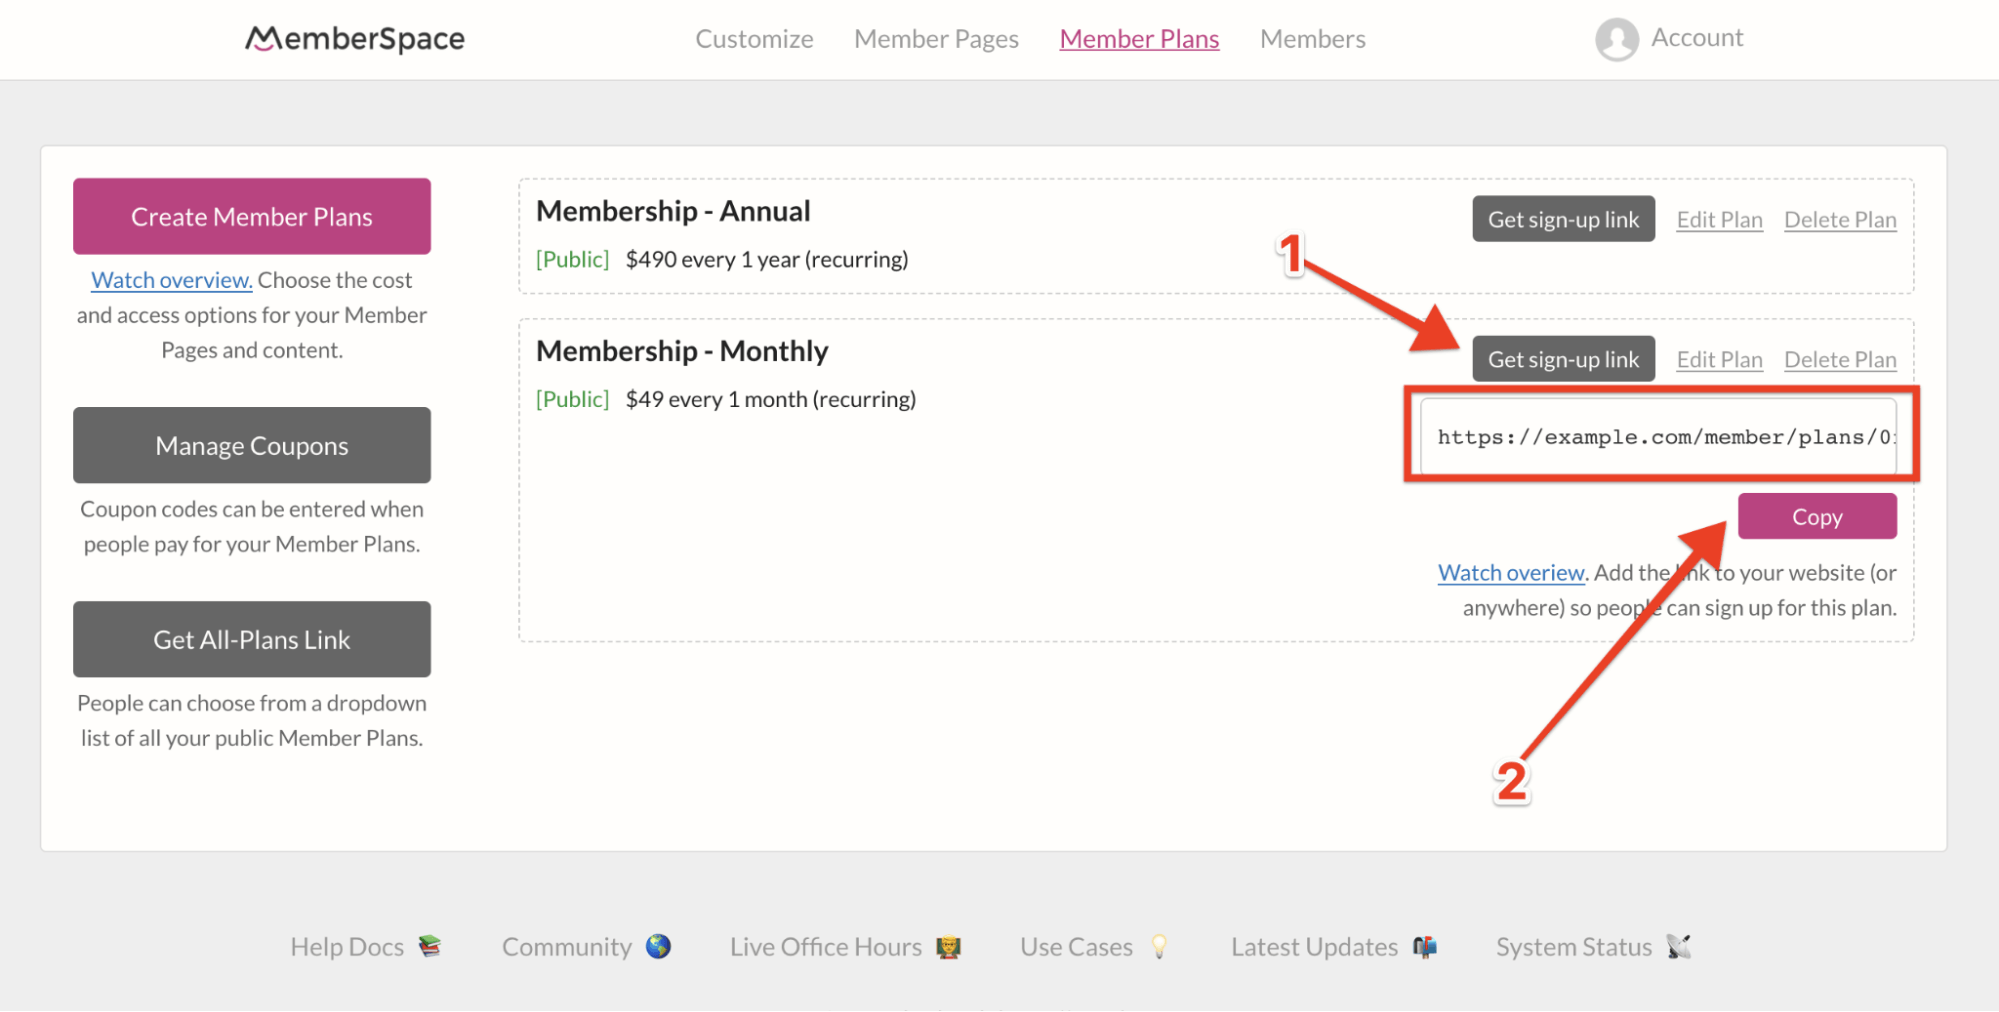
- Click the 'Member Plans' link at the top of the page
- Click the 'Get sign-up link' button next to the relevant plan and click 'Copy'
- Add the link you just copied to your website sales page or share it by email
2. Transistor
You can use Transistor to create a private podcast for your membership. We don't have a direct integration with Transistor, but you can use Zapier to connect your membership site with your private podcast on Transistor.
To set up a private feed, you'll need a Transistor 'Pro' or 'Business' account.
Step 1: Create a private podcast in Transistor
The first step is to log in to Transistor and create a private podcast:
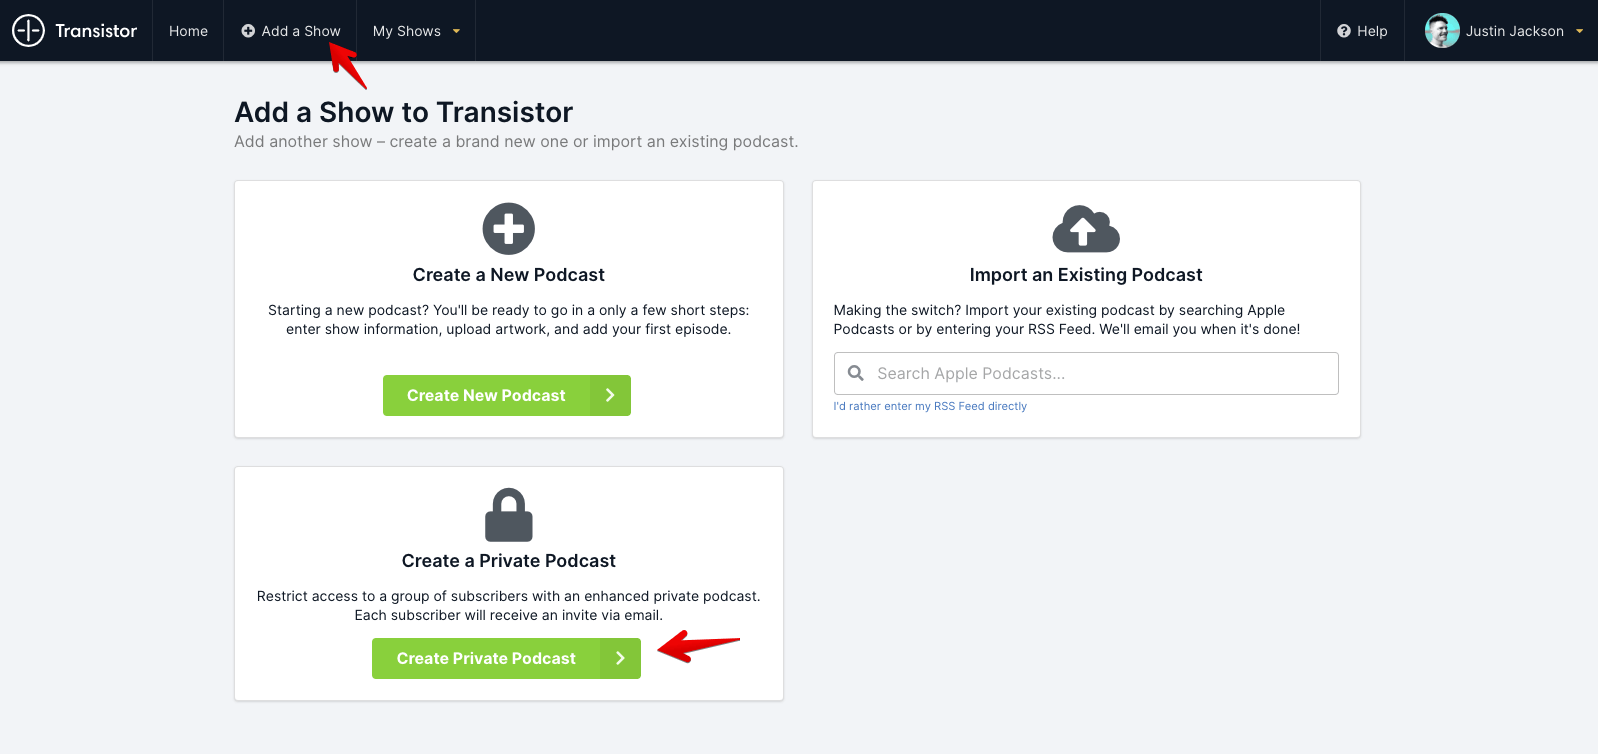
Next, upload your first episode and provide the episode title and description.
Step 2: Connect MemberSpace and Transistor using Zapier
You'll need a Zapier account to set up this integration.
Then click the 'Make a Zap' button.
You'll first need to create a 'Trigger' like this:
- Search for MemberSpace and select it as the 'Trigger'
- Select 'New Membership' as the 'Trigger Event'
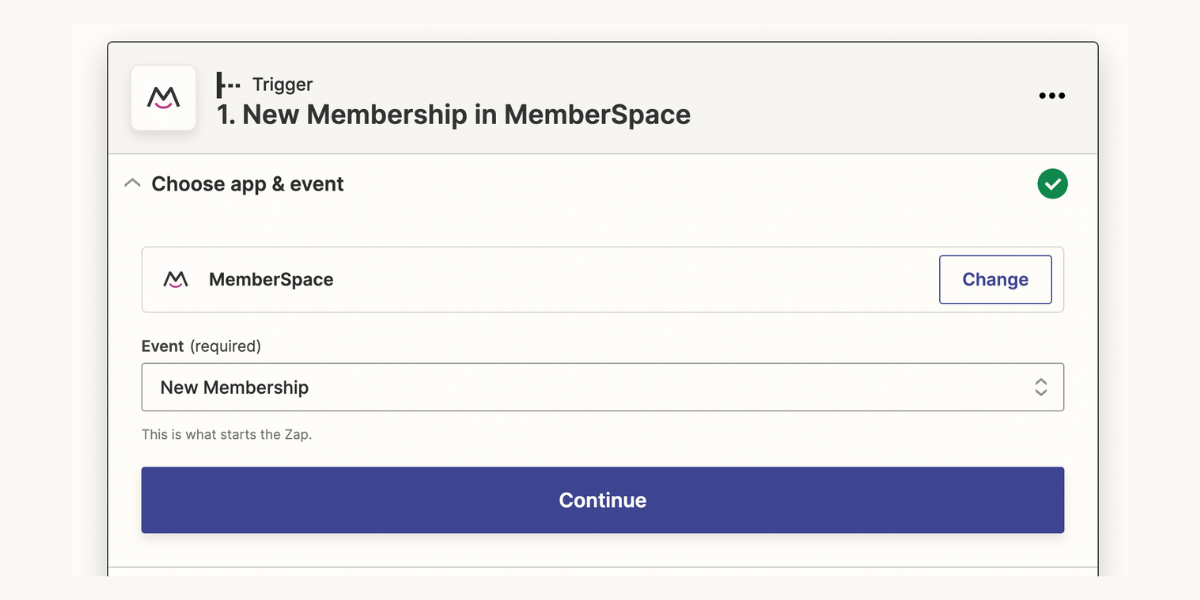
- Then click the 'Continue' button.
- Select your MemberSpace account from the drop-down menu.
- Select the Member Plans that can access the private podcast.
- Click 'Continue' and then click 'Test Trigger' to make sure it's working
Next, you'll be asked to setup the 'Action' event i.e. what should Zapier do when a new member joins one of the plans you just selected in the 'Trigger' event?
- Search for Transistor.fm and select it as the 'Action'
- Select 'Create Subscriber' as the 'Action Event'
- Click 'Continue' and then click 'Test Action' to make sure it's working
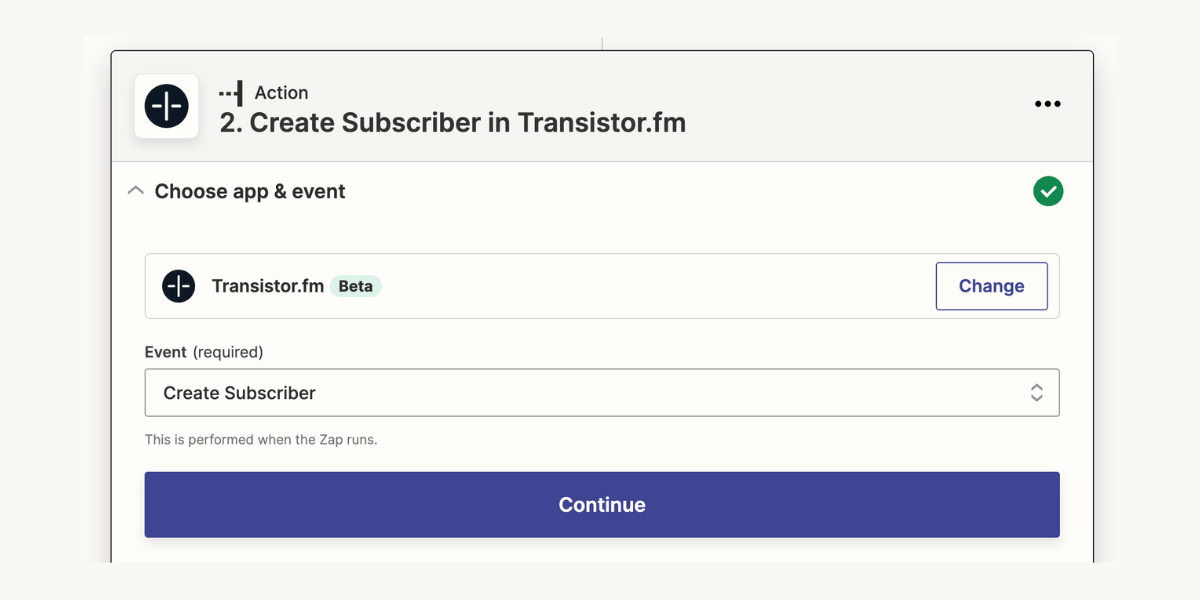
If it all looks good, you can turn on the zap.
Step 3: Setup a Zap for Member Cancellations
When a member cancels, you want to make sure that their access to the private podcast in Transistor is also cancelled.
To do this, click the 'Make a Zap' button again.
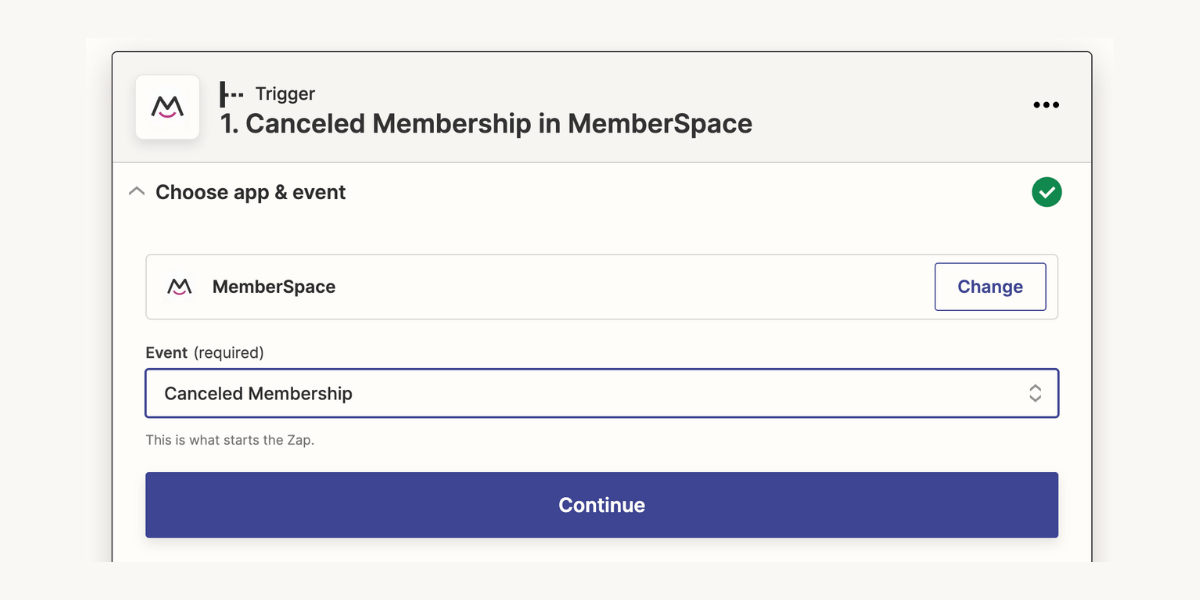
- Search for MemberSpace and select it as the 'Trigger' again
- Select 'Canceled Membership' as the 'Trigger Event'
- Click 'Continue' and complete the 'Trigger' setup
Next, you'll be asked to setup the 'Action' event again i.e. what should Zapier do when a member cancels one of the plans you just selected in the 'Trigger' event?
- Search for Transistor.fm and select it as the 'Action'
- Select 'Remove Subscriber' as the 'Action Event'
- Click 'Continue' and then click 'Test Action' to make sure it's working
When a new member joins one of your selected MemberSpace Member Plans, they'll also receive an email inviting them to the private podcast on Transistor.
And when a member cancels their membership, they will automatically also have their Transistor private podcast access canceled.
You can get more details on how to set up a private podcast feed on the Transistor site.
As you can see, there are several ways to create a private podcast for your membership. You can create a members-only private podcast page in your membership site, create a private feed for your members or create a combination of the two.
The best thing about a private podcast is that it helps improve your membership offering and potentially grow revenue. And you can manage it all from the convenience of your MemberSpace backend!